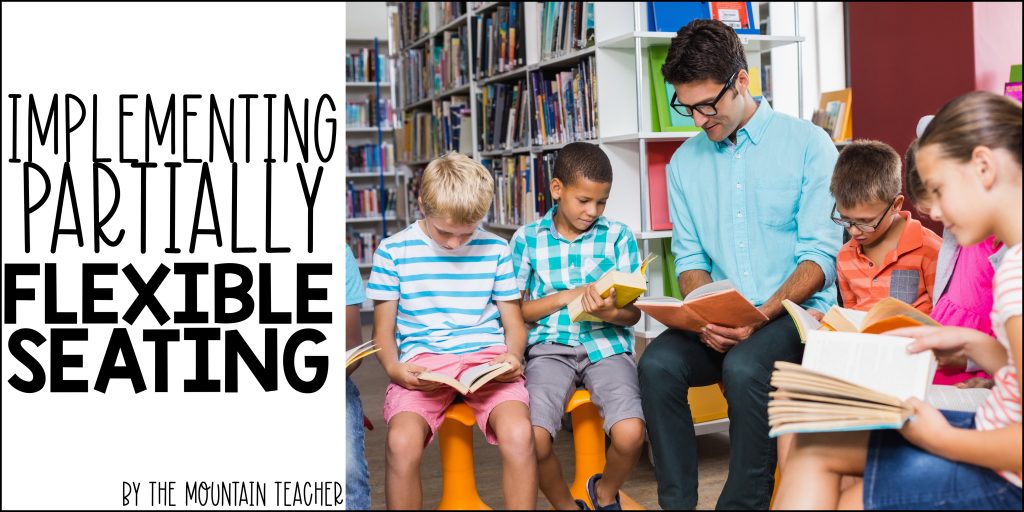
Flexible seating is a top teaching trend at the moment. At first, I was super nervous about implementing this. I thought it would be hard to manage and that flexible seating would make my classroom cluttered, disorganized and poorly managed. HOWEVER, I think I was just nervous about giving up control of my classroom and ended up being completely wrong.
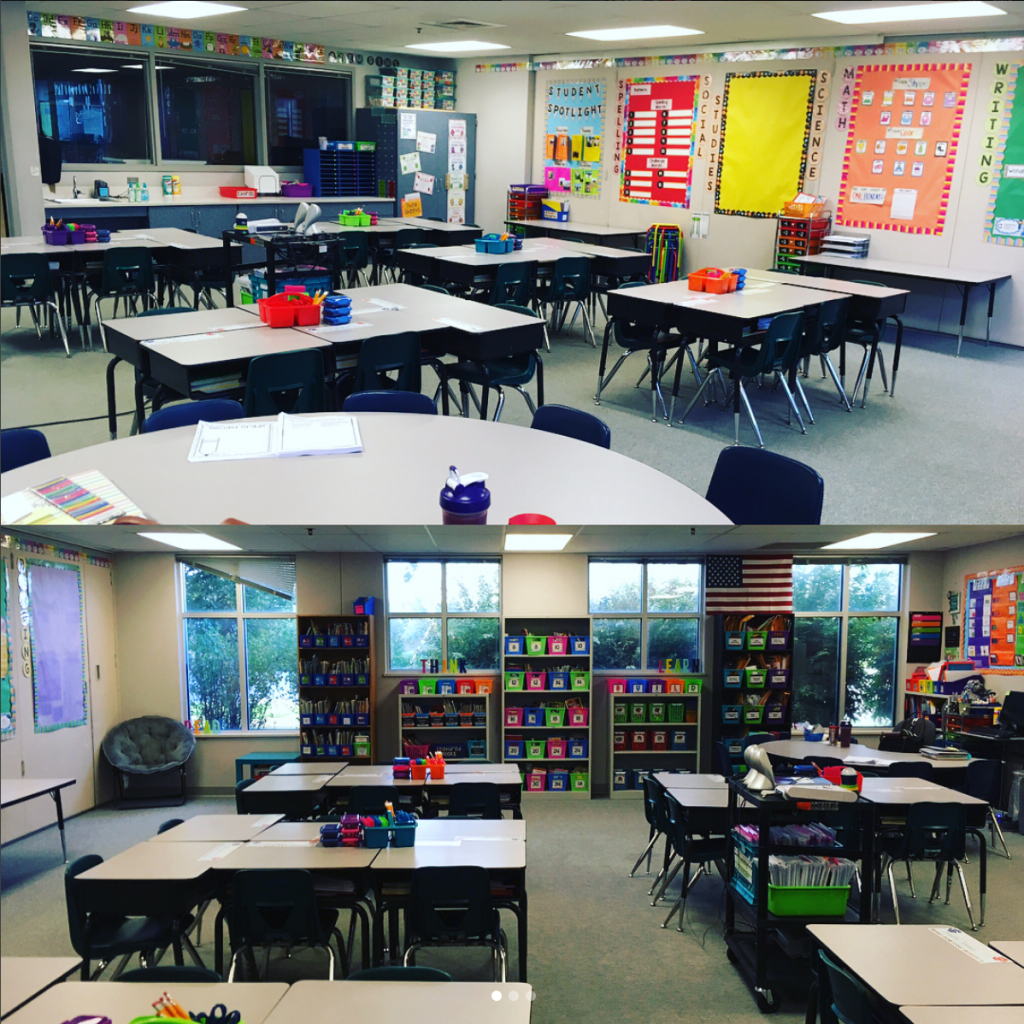
I think that one of the most important parts of flexible seating is finding the right style and implementation that works for you. Some teachers are able to rock having their students be completely flexible all day, everyday sitting in a large variety of different seating options. This is awesome for them and their students, but is not the style that works best for me. I like to call my classroom “partially flexible seating” because while we can use flexible seats 85% of the day, my students still have their own desks with regular desk chairs to fall back on. You must be thinking “WOW, her room must be HUGE to make that work!” But not exactly. I just store smartly!

What I Mean By Partially Flexible Seating:
I was hesitant on flexible seating at first because I wanted to ensure that my students who needed a place that was stable and consistent still had their own space to call their own and to store their belongings. I also wanted to make sure that if my entire class was having an off day, or needed to be more in control, we could still have the traditional classroom setup and everyone would have a seat. This is also nice for a substitute, because not all substitutes are up for handling non traditional classrooms.
Daily Implementation
So what part of my day is flexible? Most of it! My students always begin and end their day in their regular seats, and typically spend anywhere between 15-60 minutes in their regular desks a day. They are in their regular desks or sitting criss-cross-apple-sauce on my carpet when I am doing a mini lesson on the white board, when we are doing a whole group game or activity, or if I am going over rules or expectations for an assignment.
This ensures that I have everyone’s full attention and that no students are distracted or off-task. As soon as independent work starts, or certain type of group work or buddy work, I allow my students to select flexible options. To ensure that students aren’t using flexible choices that do not make sense for the activity they are doing, I constantly keep a T-Chart on my board of flexible seats we are allowed to use at the moment, and flexible seats we can use at another time.
Management:
In order to keep it fair, when it is time to start independent work, I usually go through my clip chart colors to allow students to select their seats for each activity. At the start of independent work, everyone is at their desk. Then, I will say “anyone on pink may choose a flexible seat, anyone on blue can now choose, anyone on green…” (referring to my clip chart) and so on and so forth.
It also helps that I do not allow students that have a clip below green use a flexible seat until their clip is back up onto green. Usually, this is no more than two or three students at a time, and they work very diligently to earn that privilege back.
Once students pick their flexible seating option, that is the only one they are allowed to use for the rest of the activity. When they finish, they put it back and we pick again at the beginning of the next activity. This alleviates wasted time of students switching back and forth between seating options.
I also work on a strike system. Students get one warning, and then if they are not using their seating appropriately for a second time they lose all flexible seating choices until the following day.
It also helps that I do not allow students that have a clip below green use a flexible seat until their clip is back up onto green. Usually, this is no more than two or three students at a time, and they work very diligently to earn that privilege back.
During reading and math workshops, I control what seats my students are allowed to use at each center. This ensures that students are using seating choices that make sense for what they are doing. We do not want a student sitting in a scoop chair using a laptop, however, a student reading a book could happily and effectively use the scoop chair.
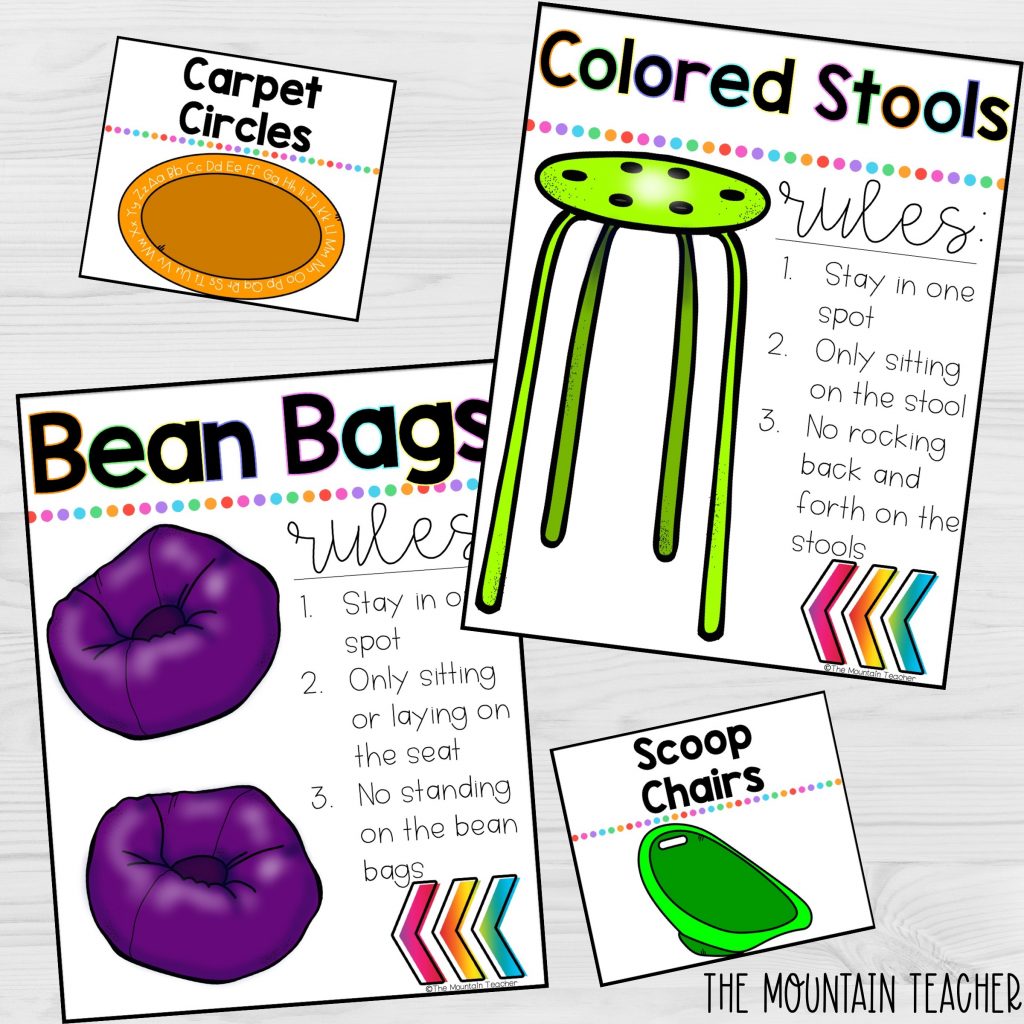
Students doing buddy games can benefit greatly from using carpet circles, students at the counter might work well on the stools.. it all just depends on what activity students are completing in each center every day! I also tell students what area of the room the flexible option should be located in during that time. During workshop time, students leave the seats there instead of putting them away to save time during transitions. Students also ALWAYS have the option to sit at their regular seat in their regular chair during workshops.
I also want to add that not every day is flexible and that is OKAY. However, I do think it is key to start teaching routines as early as possible so that you are not wasting time teaching this later in the year. Although, you can add new options or fully start in the middle of a year, it just might be more convenient in the beginning of the year.

A Slow and Controlled Introduction:
Even though I had always allowed my students to work anywhere they wanted in the room once independent work began, I was still so nervous about losing control of my classroom or my students breaking all of these new pretty seats I purchased for them. Part of this fear can be alleviated by having a slow and controlled introduction to flexible seats, during which all expectations are clearly set.
The first flexible option that I let my students experiment with is clipboards. This is partially because I have a class set, and partially because it seems the “least risky”. Our entire class reviews the expectations of using clipboards, and practices using them all at the same time. We talk about do’s and don’ts and the correct places to use a clipboard. Then, we all practice using them and we all practice putting them away.
Then I will introduce one more flexible option. Usually, I will do the next smallest threat, such as carpet squares or stools, since these are more akin to regular desks or laying on the floor to read a book. We follow the same routine going over do’s and don’ts and I break my students into rotating groups, ensuring that every student gets to try our new flexible seat sometime during the day.
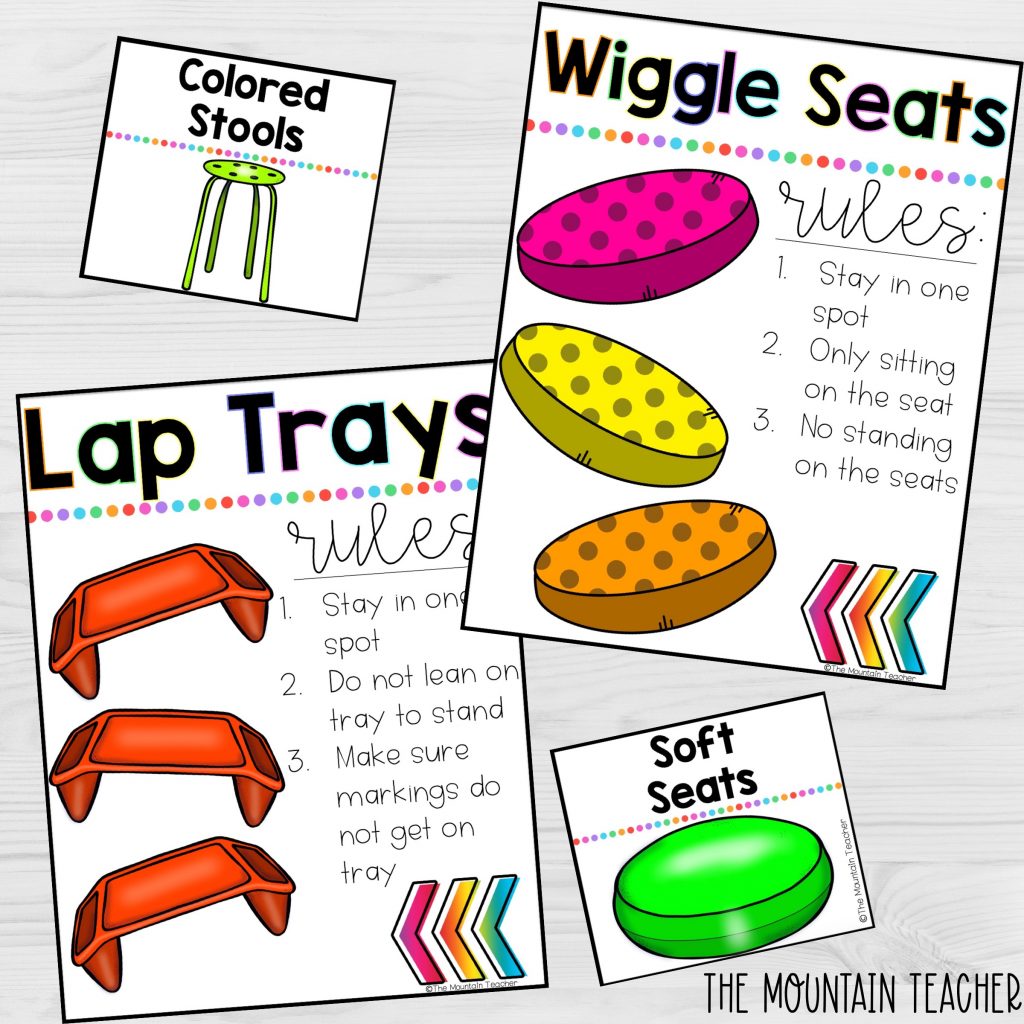
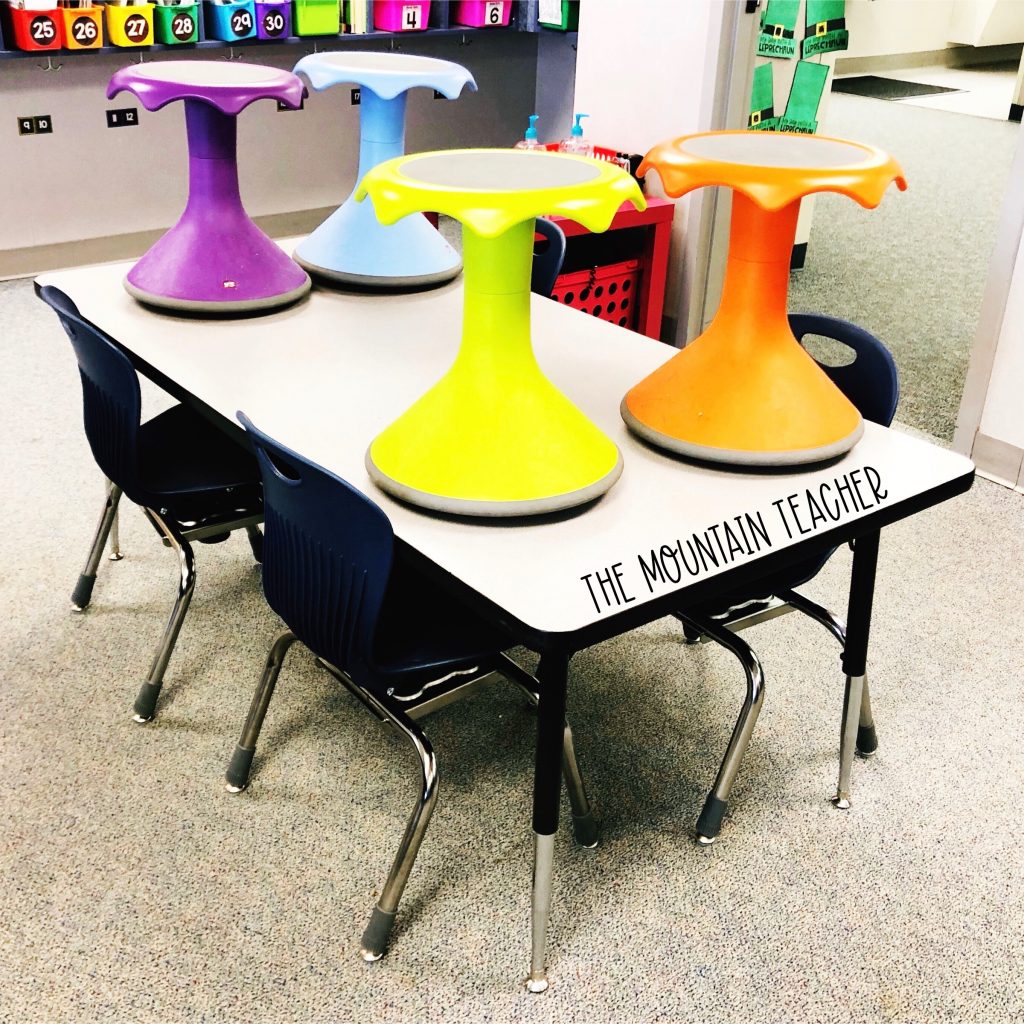
I slowly introduce options one-by-one, explicitly going over expectations on how to use each one and expectations on how to put them back. I make sure every student gets to try every seat on the day that I introduce it. I go in order of the most low-key options to the most prized options, such as scoop chairs and wiggle seats. As we review each type of seat, I hang an anchor chart for students to remember the routines from that stays either displayed on a flexible seating bulletin board or stays on the storage container for that option, so students have a constant visual reminder of the expectations.

Set Expectations for Partially Flexible Seating:
If you would like to take a closer look at the anchor charts that I use, please click here. You also might find that you would like making your own with the students. This resource allows a blank chart to write in your class’ specific expectations in too, as well as a clip art photo of the resource as a reminder.
Finding Flexible Seats:
I tried to stick with options that I thought would work well for partial flexible seating. That meant affordable options that were also easy to stack, store and put away if they were not working. I also wanted to be able to get a small group set of each object, so I needed to get things that were not too far out of my budget. I have 8 or more of every type of seat.
I have a ton of different flexible seats in my classroom that I received from various Go Fund Me classroom campaigns. Find my favorite flexible seating choices on my blog.
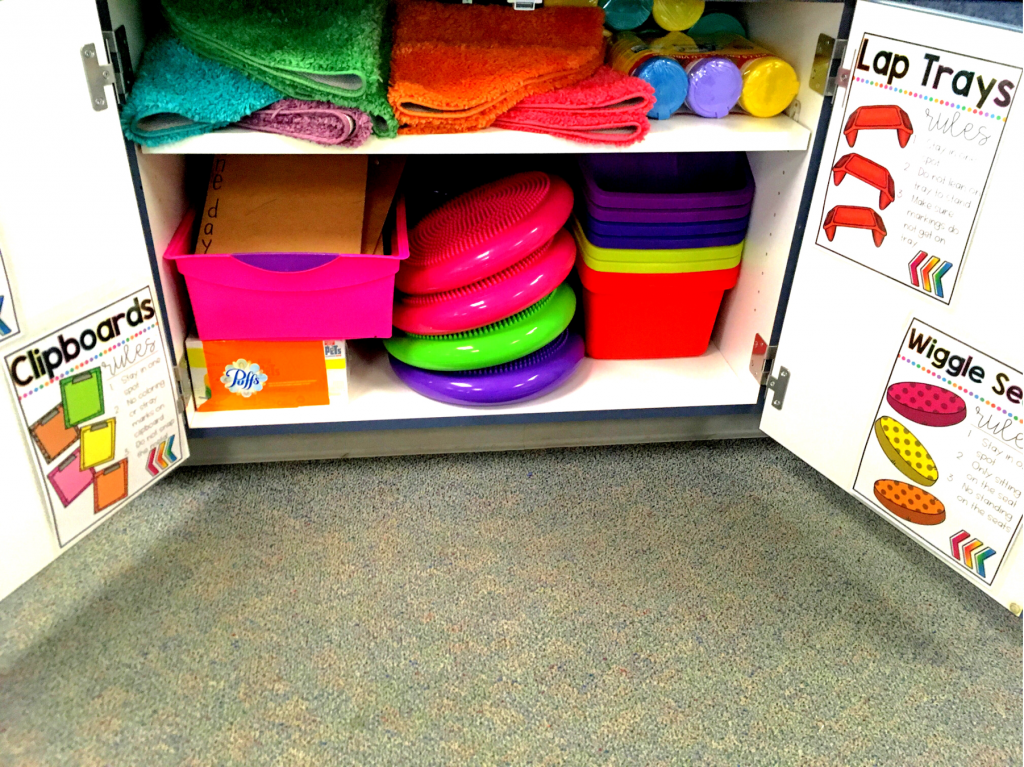
Storing Options for Partially Flexible Seating:
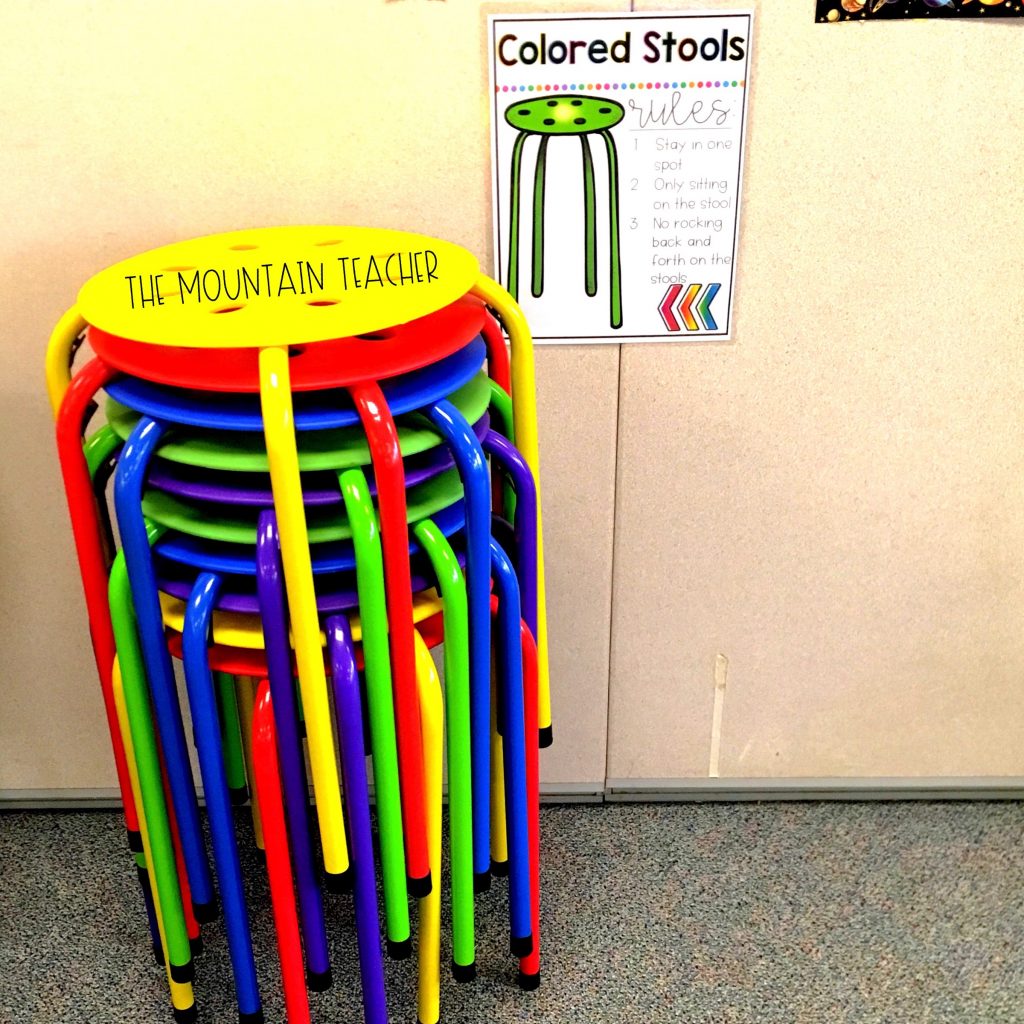
So what about the clutter? Having 30 regular desks and almost 50 flexible seats takes up A LOT of room, and could cause your classroom to be a cluttered catastrophe. However, I am one of those teachers that does NOT like to pile up stuff in my room, and I do not like to look at stuff that is not currently being used.
Therefore, all of my flexible seating goes back into cabinets or gets neatly stacked or stored in a bin when it is not being used. This works well because I am already a minimalist, so I try to keep my cabinets as empty as possible, even before I implemented flexible seating.
I also teach my students how to neatly put the flexible seating away, and am a stickler about it looking neat the beginning of the year in order for this organization to continue throughout the year. If students fail to neatly put away a type of seat, or break a seat while haphazardly using it or putting it away we lose that seat for a period of time (sometimes a day, sometimes 2-3 days).
Is partially flexible seating the right path for you? Let me know what questions you have in the comments section!